


'%3e%3cpath%20d='M17.5%208.75C17.5%2013.58%2013.58%2017.5%208.75%2017.5C3.92%2017.5%200%2013.58%200%208.75C0%203.92%203.92%200%208.75%200C13.58%200%2017.5%203.92%2017.5%208.75Z'%20fill='%23F56708'/%3e%3cpath%20d='M13.2123%2010.85H12.7048C11.9698%2012.915%2011.5498%2013.125%2010.4473%2013.125H8.22482C7.62982%2013.125%207.27982%2012.8275%207.27982%2012.215V9.065C10.1498%209.065%2010.0098%208.9425%2010.3248%2010.535H10.9023C10.8848%209.9925%2010.8673%209.205%2010.8673%208.6975C10.8673%208.2075%2010.8848%207.4375%2010.9373%206.79H10.3598C10.0448%208.4875%2010.2023%208.33%207.29732%208.3475V4.6025C7.29732%204.4275%207.34982%204.375%207.52482%204.375H10.6573C11.3573%204.375%2011.6898%204.83%2012.0398%206.475H12.5823L12.7573%203.5C11.3748%203.64%2010.4123%203.64%208.73232%203.64C7.03482%203.64%205.59982%203.6225%204.00732%203.5525V4.235C5.26732%204.375%205.40732%204.55%205.42482%205.11C5.45982%205.88%205.47732%207.42%205.47732%208.715C5.47732%2010.0275%205.47732%2011.585%205.44232%2012.3725C5.40732%2012.9325%205.28482%2013.1075%204.02482%2013.2475V13.93C4.75982%2013.8775%206.64982%2013.86%208.36482%2013.86C8.97732%2013.86%2010.1498%2013.825%2012.8623%2013.93L13.2123%2010.85Z'%20fill='white'/%3e%3c/g%3e%3cdefs%3e%3cclipPath%20id='clip0_2416_2431'%3e%3crect%20width='17.5'%20height='17.5'%20fill='white'/%3e%3c/clipPath%3e%3c/defs%3e%3c/svg%3e)
%20scale(1.1)'%20fill='%23FFFFFF'%3e%3cpath%20d='M22.655%208.719c-1.802-1.801-4.726-1.801-6.564%200l-7.351%207.35c-.45.45-.45%201.2%200%201.65.45.449%201.2.449%201.65%200l7.351-7.351c.899-.899%202.362-.899%203.264%200%20.9.9.9%202.364%200%203.264l-7.239%207.239c.9.899%202.362.899%203.263%200l5.589-5.589c1.836-1.838%201.836-4.763.037-6.563zm-2.475%202.437c-.451-.45-1.201-.45-1.65%200l-7.354%207.389c-.9.899-2.361.899-3.262%200-.45-.45-1.2-.45-1.65%200s-.45%201.2%200%201.649c1.801%201.801%204.726%201.801%206.564%200l7.351-7.35c.449-.487.449-1.239.001-1.688zm-2.439-7.35c-1.801-1.801-4.726-1.801-6.564%200l-7.351%207.351c-.45.449-.45%201.199%200%201.649s1.2.45%201.65%200l7.395-7.351c.9-.899%202.371-.899%203.27%200%20.451.45%201.201.45%201.65%200%20.421-.487.421-1.199-.029-1.649h-.021zm-2.475%202.437c-.45-.45-1.2-.45-1.65%200l-7.351%207.389c-.899.9-2.363.9-3.265%200-.9-.899-.9-2.363%200-3.264l7.239-7.239c-.9-.9-2.362-.9-3.263%200L1.35%208.719c-1.8%201.8-1.8%204.725%200%206.563%201.801%201.801%204.725%201.801%206.564%200l7.35-7.351c.451-.488.451-1.238%200-1.688h.002z'/%3e%3c/g%3e%3c/svg%3e)

 Louie · June 06, 2026
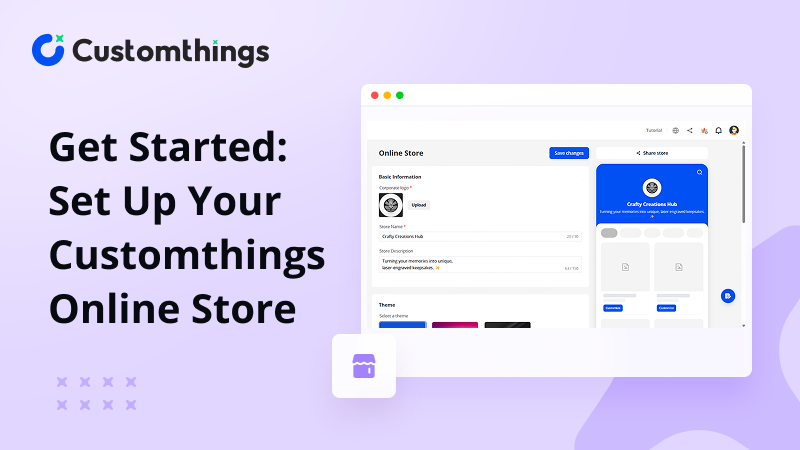
Get Started: Set Up Your Customthings Online Store
What is Customthings Online Store?
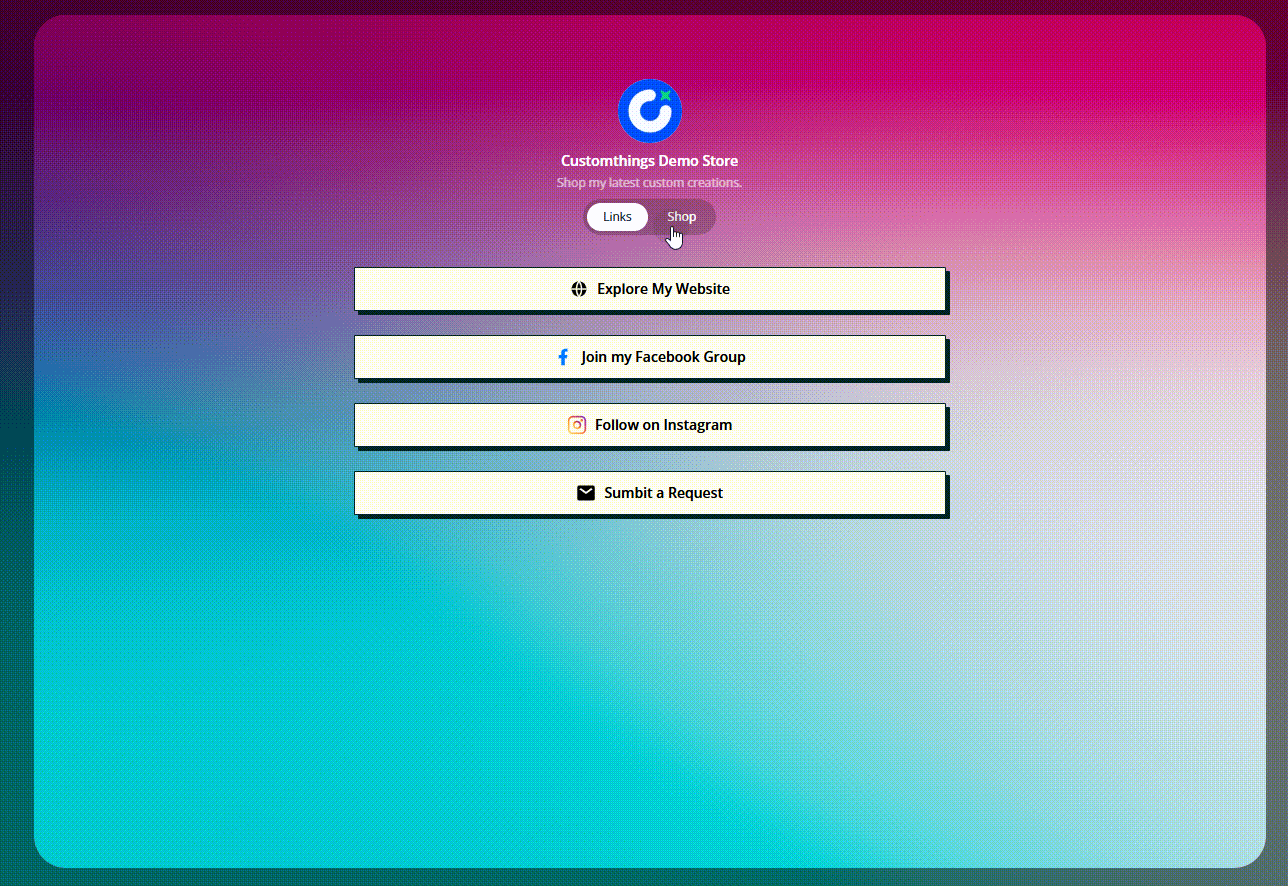
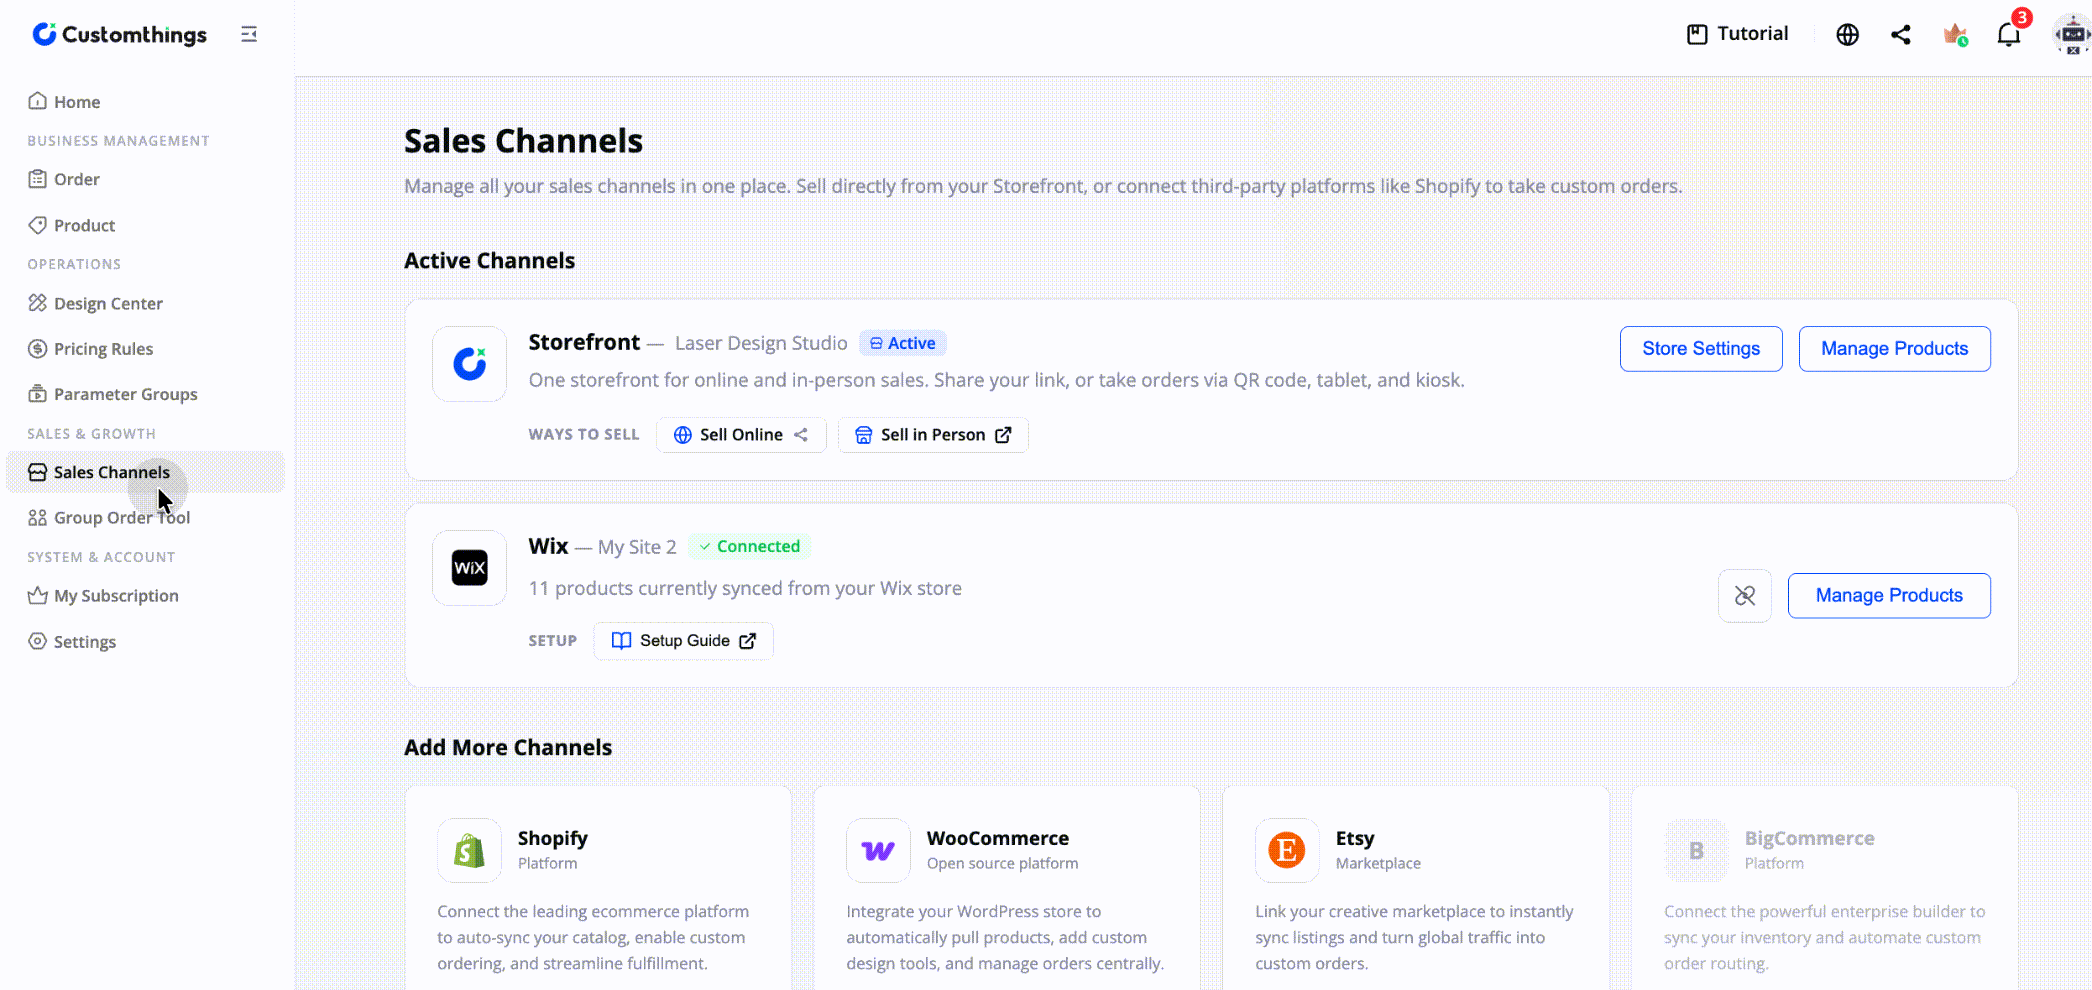
When you create your account, Customthings automatically sets up an online store (H5 storefront) for you with a default name. This store is now listed as one of your Sales Channels, alongside any external platforms you connect (Shopify, Etsy, etc.).
It works like a lightweight Linktree-style site: your products, your branding, and links to your social channels, all in one shareable URL. Customers can browse products, open the customization editor, personalize items, and submit orders — all without leaving the page.
How to Access Store Settings
Go to Sales Channel in the left sidebar. Your Customthings online store appears as the default channel. Click on it, then open Store Settings to configure your store.
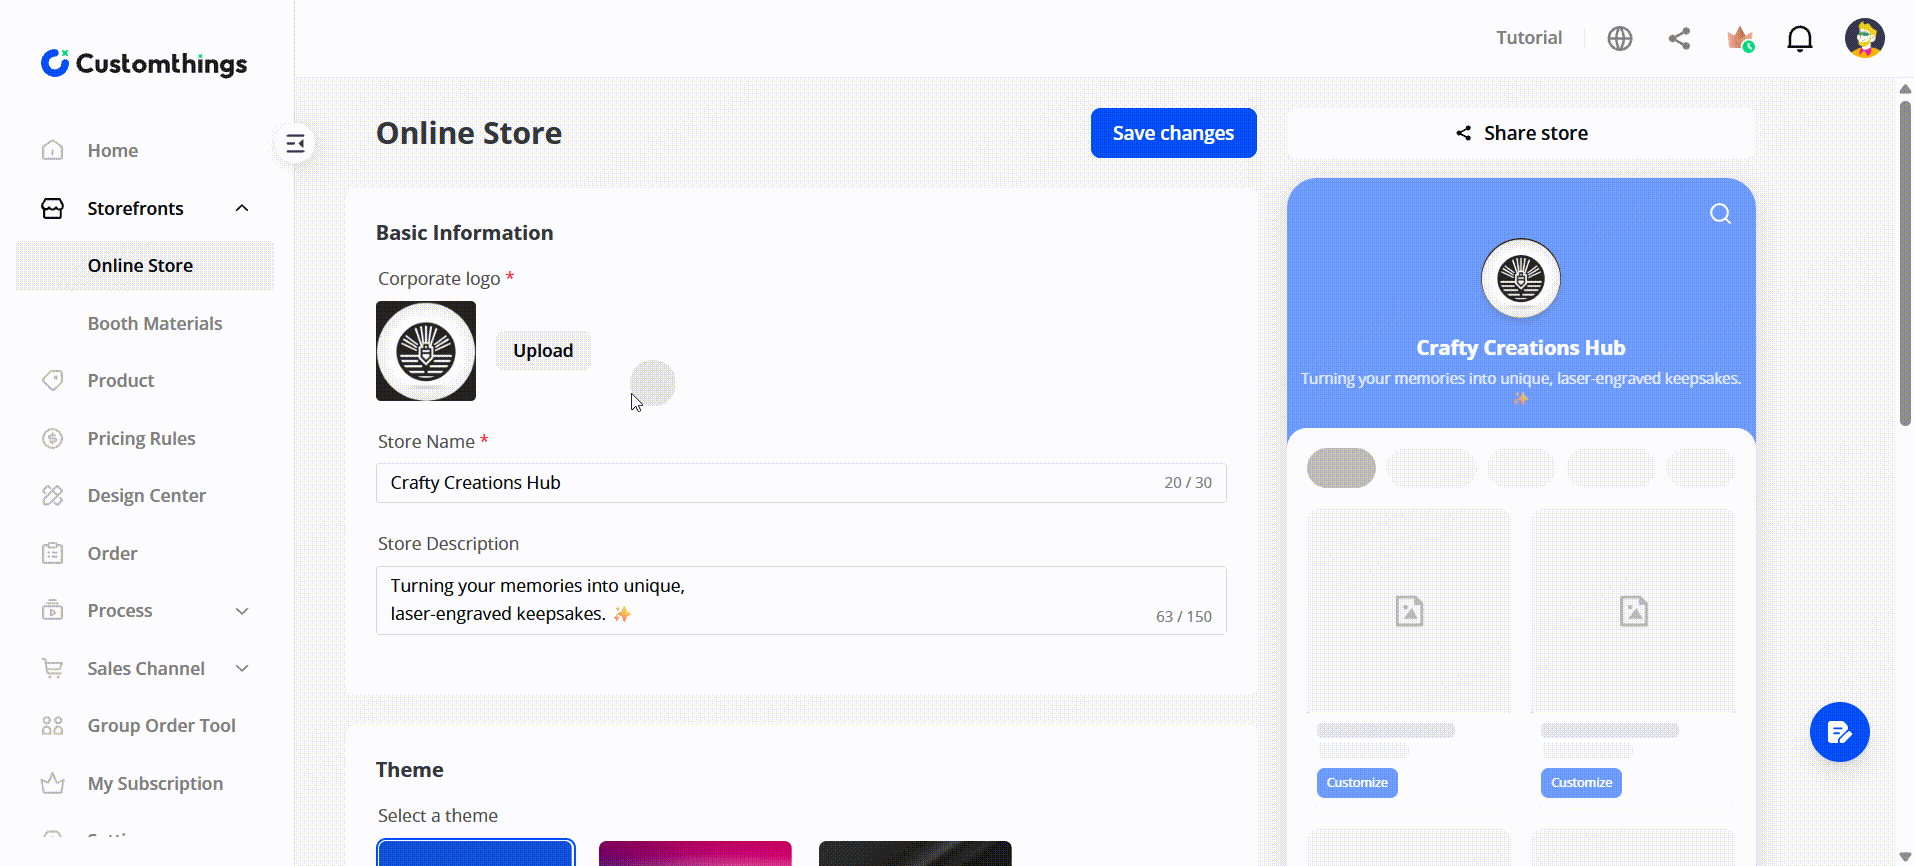
Step 1: Set Your Brand Identity
- Store name — the name displayed at the top of your page
- Corporate logo — your brand mark, shown on the Storefronts header
- Theme — pick a palette that matches your brand
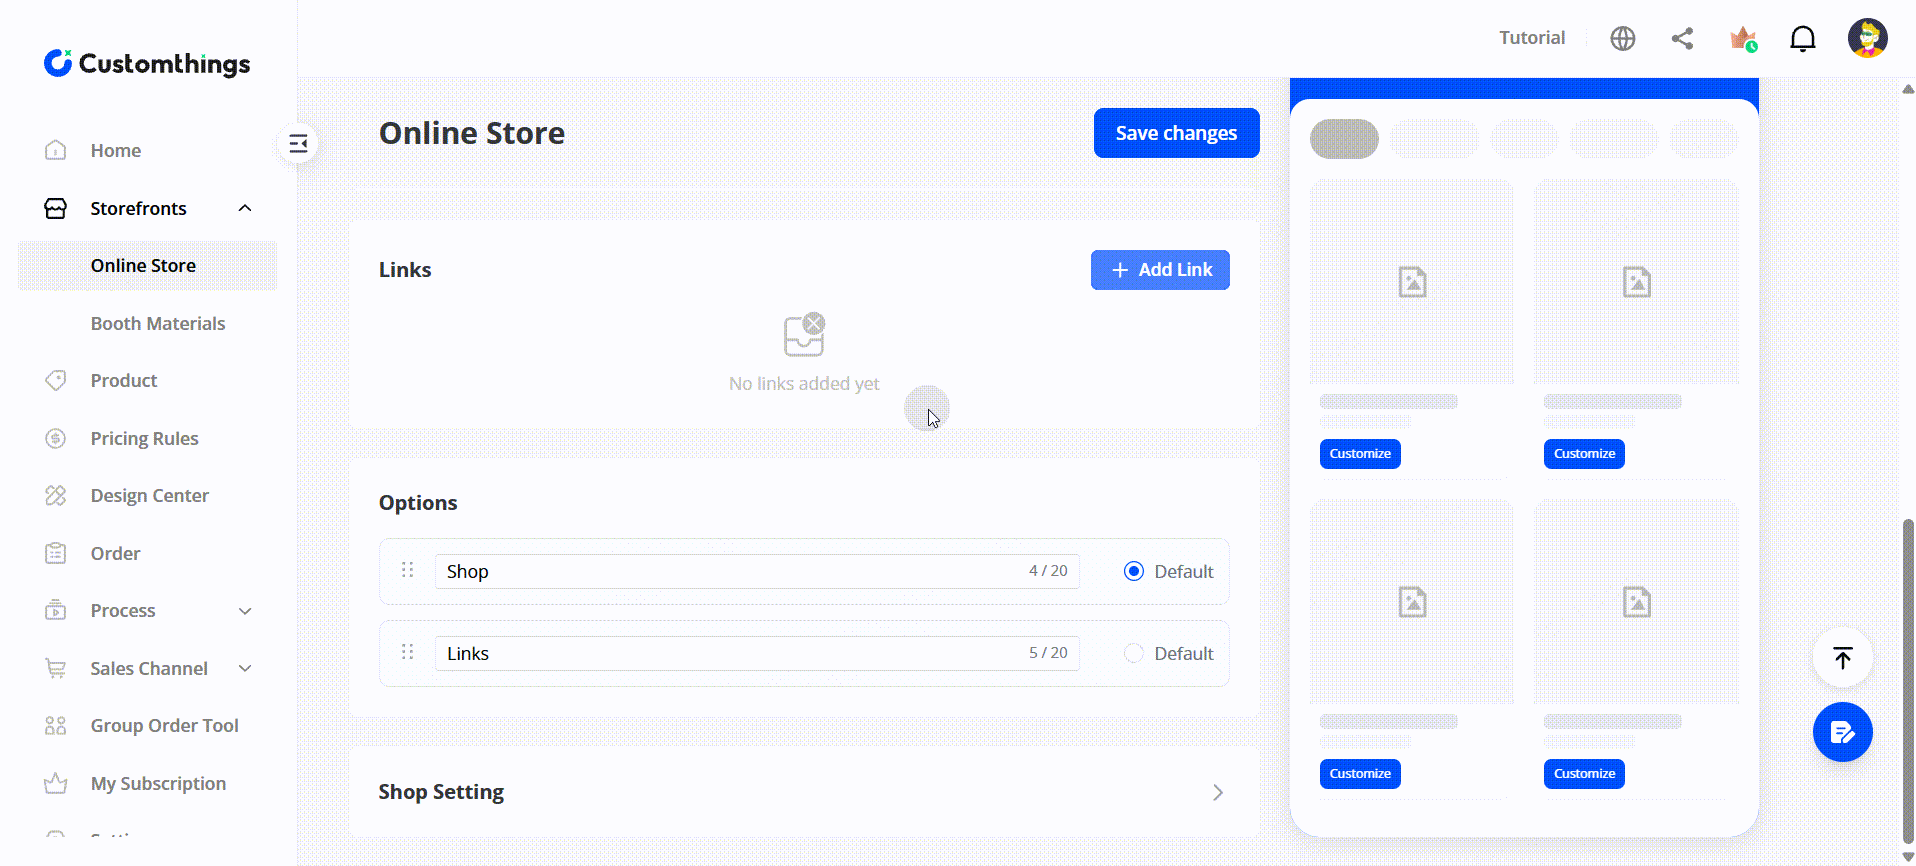
Step 2: Add Social Links & Banners
- Social media links — add your Facebook, Instagram, or any other profiles. These show up as icons on your Storefronts, giving customers a path to follow you elsewhere.
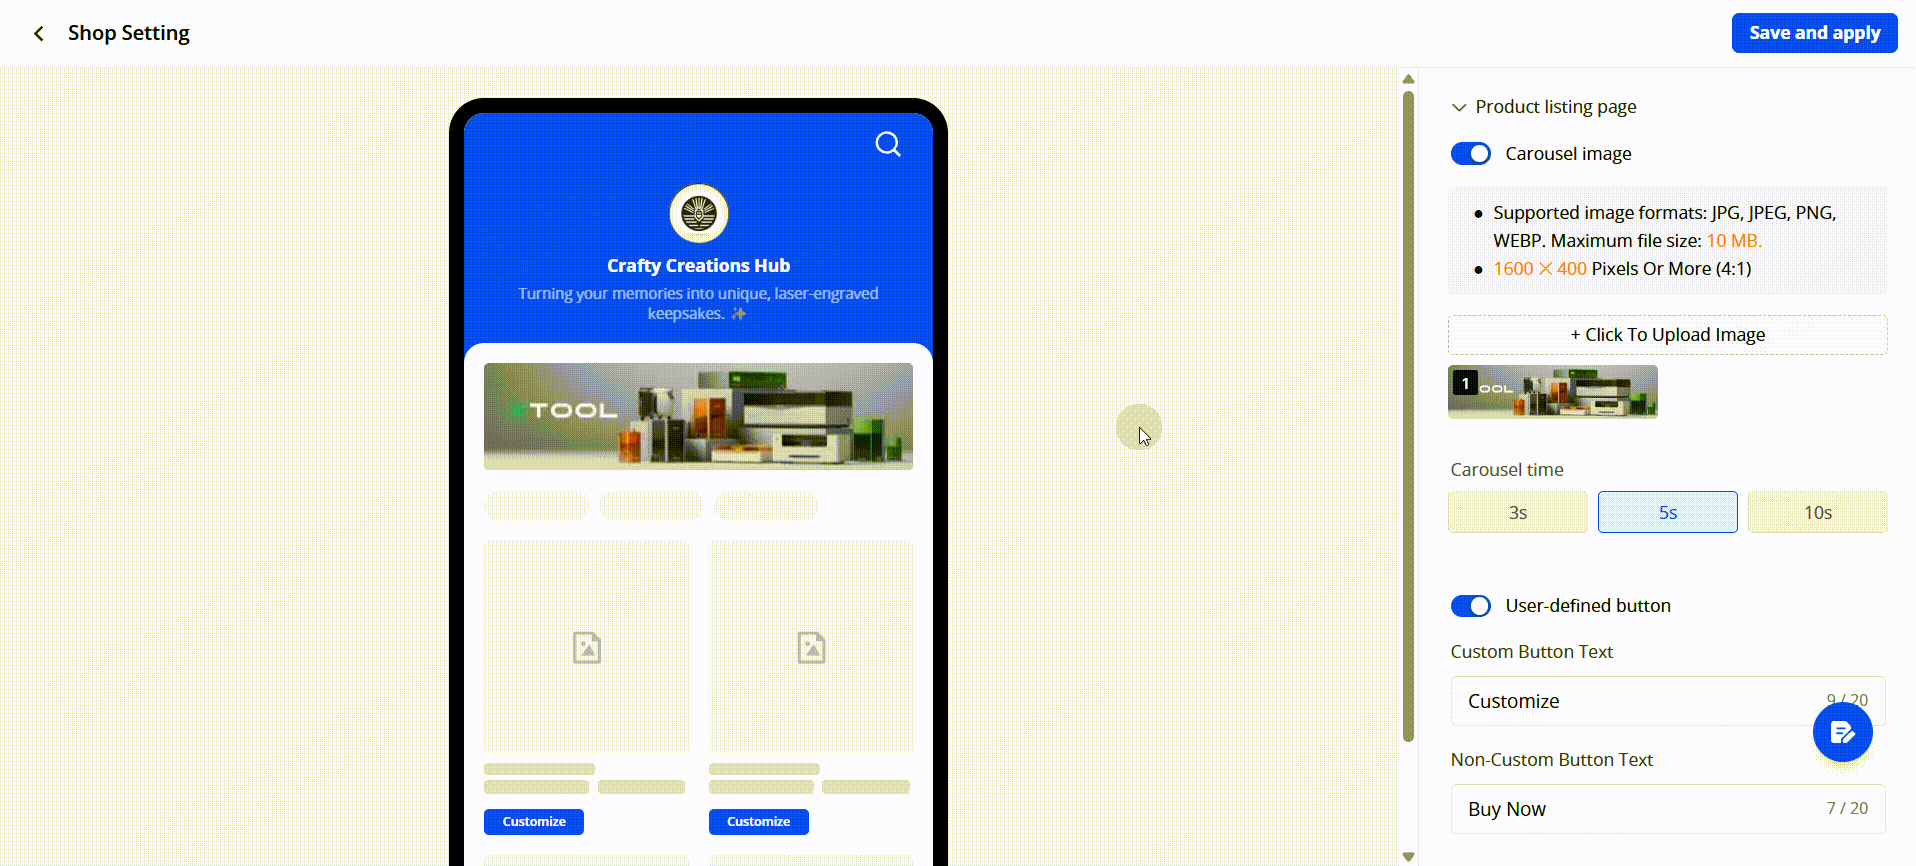
- Brand banner — upload a carousel image that appears at the top of your store for extra visual impact.
Step 3: Configure Order Fields
- Email address (recommended — so you can follow up)
- Contact name
- Any other fields relevant to your workflow
Step 4: Share Your Store
- A shareable link — send it via email, text, or post it on social media
- A QR code — print it on a poster, table stand, or business card for in-person events
Managing Products in Your Online Store
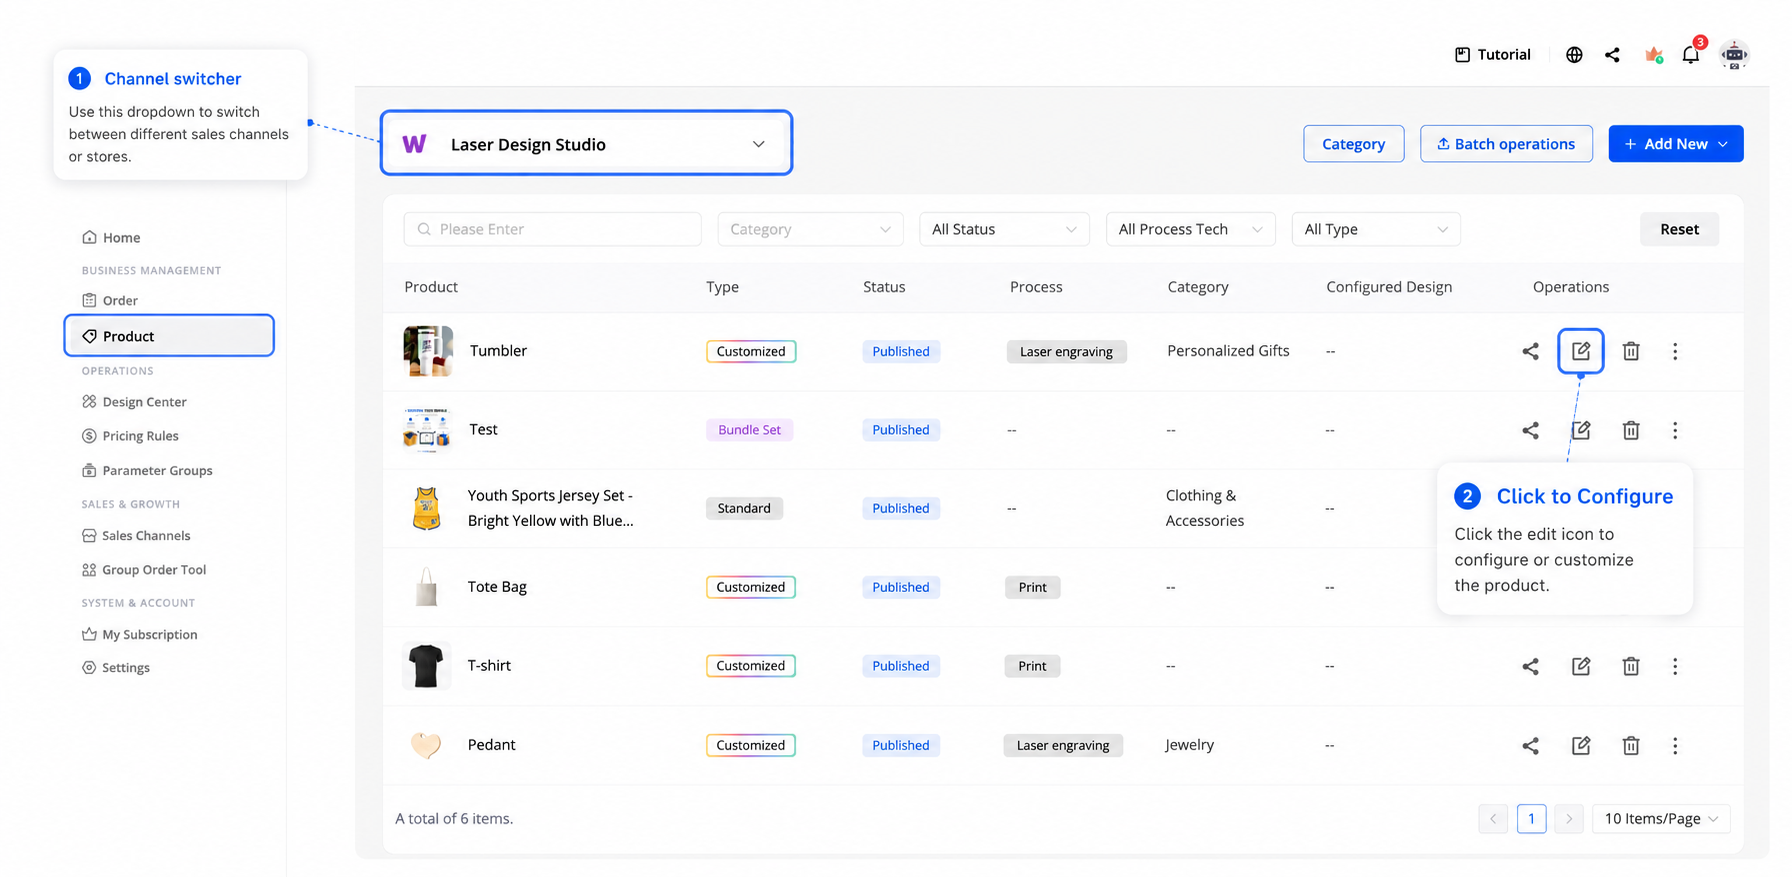
Go to the Product page and make sure the channel switcher (top-left) is set to your Customthings store. Products you create here appear on your storefront automatically.
Tips
- You don't need products to set up your Customthings Online Store — but it will look empty until you add some. We recommend setting up branding first, then creating products.
- The QR code is great for in-person selling. Print it on a table stand, hand it out at craft fairs, or display it next to your xTool machine at events. You can also generate branded posters and table stands directly from Customthings for a more polished look.
- Your Customthings Online Store updates automatically. Every product you create or update in the dashboard appears in your store in real time.