


'%3e%3cpath%20d='M17.5%208.75C17.5%2013.58%2013.58%2017.5%208.75%2017.5C3.92%2017.5%200%2013.58%200%208.75C0%203.92%203.92%200%208.75%200C13.58%200%2017.5%203.92%2017.5%208.75Z'%20fill='%23F56708'/%3e%3cpath%20d='M13.2123%2010.85H12.7048C11.9698%2012.915%2011.5498%2013.125%2010.4473%2013.125H8.22482C7.62982%2013.125%207.27982%2012.8275%207.27982%2012.215V9.065C10.1498%209.065%2010.0098%208.9425%2010.3248%2010.535H10.9023C10.8848%209.9925%2010.8673%209.205%2010.8673%208.6975C10.8673%208.2075%2010.8848%207.4375%2010.9373%206.79H10.3598C10.0448%208.4875%2010.2023%208.33%207.29732%208.3475V4.6025C7.29732%204.4275%207.34982%204.375%207.52482%204.375H10.6573C11.3573%204.375%2011.6898%204.83%2012.0398%206.475H12.5823L12.7573%203.5C11.3748%203.64%2010.4123%203.64%208.73232%203.64C7.03482%203.64%205.59982%203.6225%204.00732%203.5525V4.235C5.26732%204.375%205.40732%204.55%205.42482%205.11C5.45982%205.88%205.47732%207.42%205.47732%208.715C5.47732%2010.0275%205.47732%2011.585%205.44232%2012.3725C5.40732%2012.9325%205.28482%2013.1075%204.02482%2013.2475V13.93C4.75982%2013.8775%206.64982%2013.86%208.36482%2013.86C8.97732%2013.86%2010.1498%2013.825%2012.8623%2013.93L13.2123%2010.85Z'%20fill='white'/%3e%3c/g%3e%3cdefs%3e%3cclipPath%20id='clip0_2416_2431'%3e%3crect%20width='17.5'%20height='17.5'%20fill='white'/%3e%3c/clipPath%3e%3c/defs%3e%3c/svg%3e)
%20scale(1.1)'%20fill='%23FFFFFF'%3e%3cpath%20d='M22.655%208.719c-1.802-1.801-4.726-1.801-6.564%200l-7.351%207.35c-.45.45-.45%201.2%200%201.65.45.449%201.2.449%201.65%200l7.351-7.351c.899-.899%202.362-.899%203.264%200%20.9.9.9%202.364%200%203.264l-7.239%207.239c.9.899%202.362.899%203.263%200l5.589-5.589c1.836-1.838%201.836-4.763.037-6.563zm-2.475%202.437c-.451-.45-1.201-.45-1.65%200l-7.354%207.389c-.9.899-2.361.899-3.262%200-.45-.45-1.2-.45-1.65%200s-.45%201.2%200%201.649c1.801%201.801%204.726%201.801%206.564%200l7.351-7.35c.449-.487.449-1.239.001-1.688zm-2.439-7.35c-1.801-1.801-4.726-1.801-6.564%200l-7.351%207.351c-.45.449-.45%201.199%200%201.649s1.2.45%201.65%200l7.395-7.351c.9-.899%202.371-.899%203.27%200%20.451.45%201.201.45%201.65%200%20.421-.487.421-1.199-.029-1.649h-.021zm-2.475%202.437c-.45-.45-1.2-.45-1.65%200l-7.351%207.389c-.899.9-2.363.9-3.265%200-.9-.899-.9-2.363%200-3.264l7.239-7.239c-.9-.9-2.362-.9-3.263%200L1.35%208.719c-1.8%201.8-1.8%204.725%200%206.563%201.801%201.801%204.725%201.801%206.564%200l7.35-7.351c.451-.488.451-1.238%200-1.688h.002z'/%3e%3c/g%3e%3c/svg%3e)

 Louie · June 25, 2026
Get Started: Create Your First Product
Updated for April 2026: adds the new Wizard-mode flow, Quick Customization Mode, and notes the new Bundle Set option.
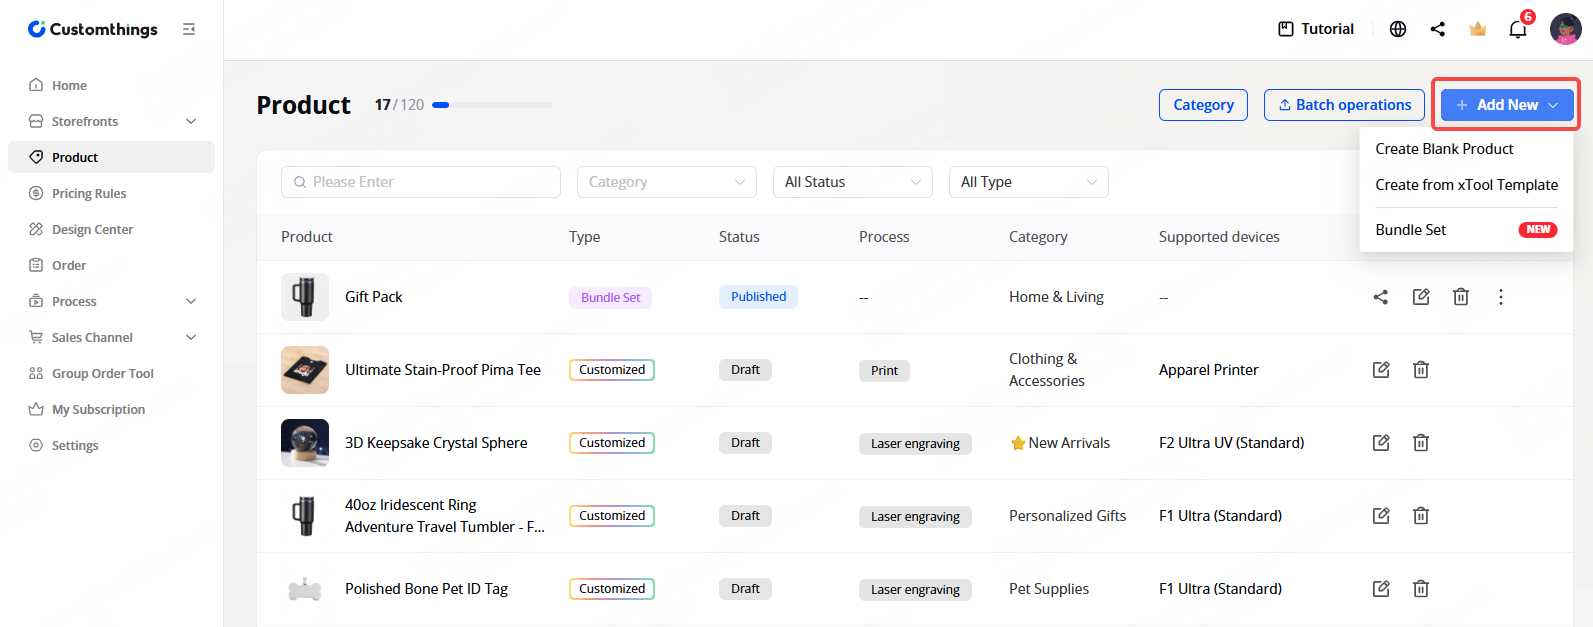
Two Ways to Create a Product
Method | Best for |
|---|---|
From the Template Library | Getting started fast. Templates come pre-configured with listing info, customization zones, and processing parameters — just tweak and publish. |
From Scratch | Full control. Build your product listing, customization options, and machine settings from the ground up. |
- To start from scratch → select Create Blank Product
- To use a template → select Create from xTool Template
- Bundle Set: lets you combine products you've already published into a gift set or themed package. See Sell Bundles: Group Your Products into Gift Sets for the full guide.
Method A: Create a Blank Product From Scratch
Create Blank Product opens in Wizard mode by default — a four-step guided flow. If you prefer the old single-page form, use the Switch to old version link at the top.
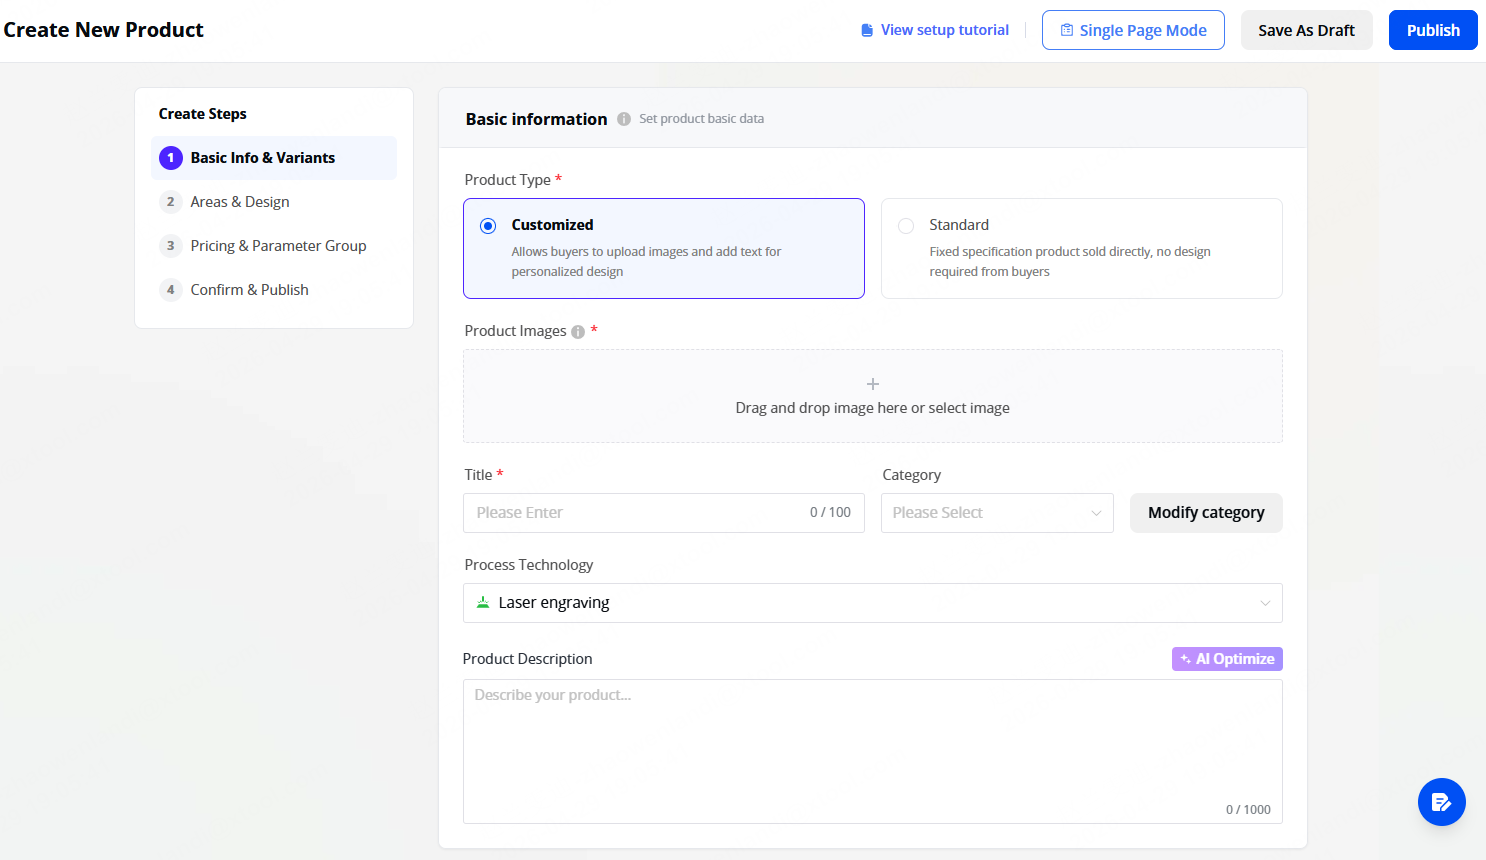
1. Standard Product (Ready-Made)
💡Pro tip: Use the AI Quick Upload feature. Snap a photo of your product (even on a messy desk — no white background needed), and Customthings will automatically generate a product title, identify the item, and suggest variants. You can also upload an XCS file directly.
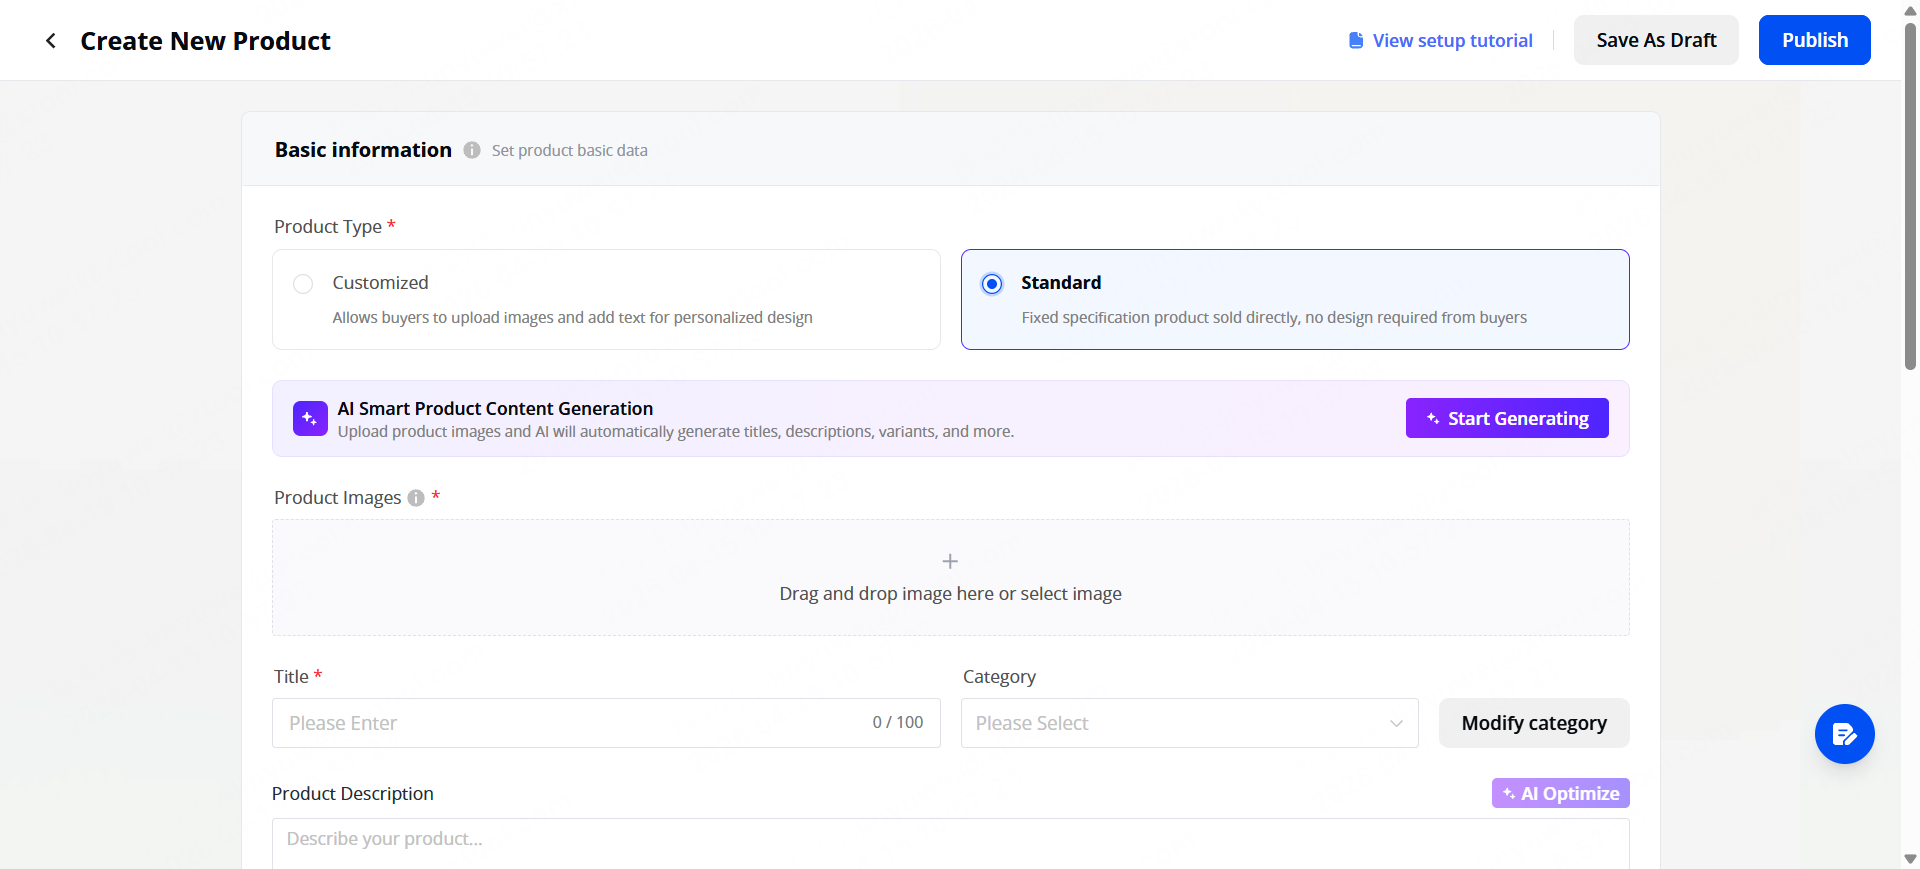
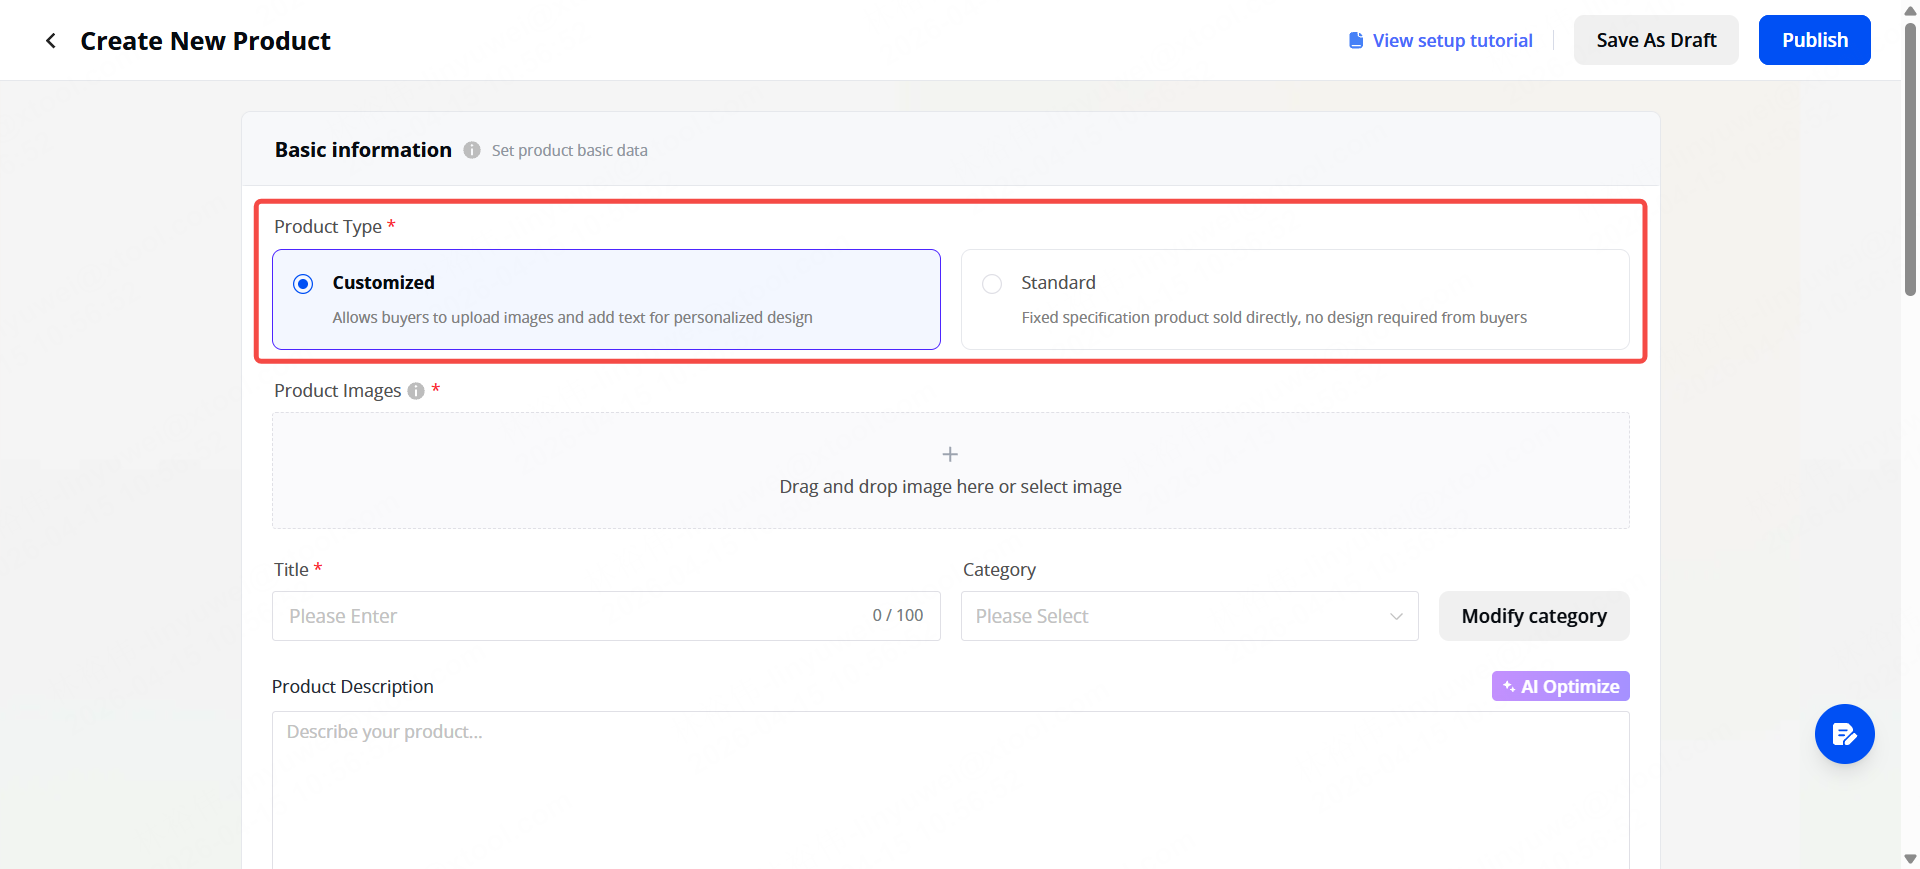
2. Customized Product
1. Basic Listing Info
💡Use the AI Optimize button to enhance your description instantly.

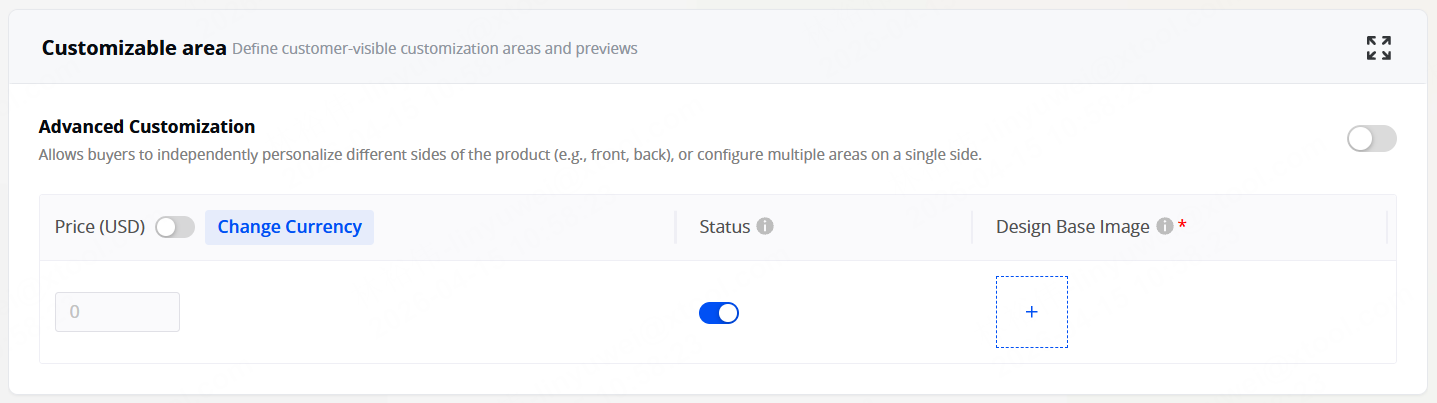
2. Customizable Area
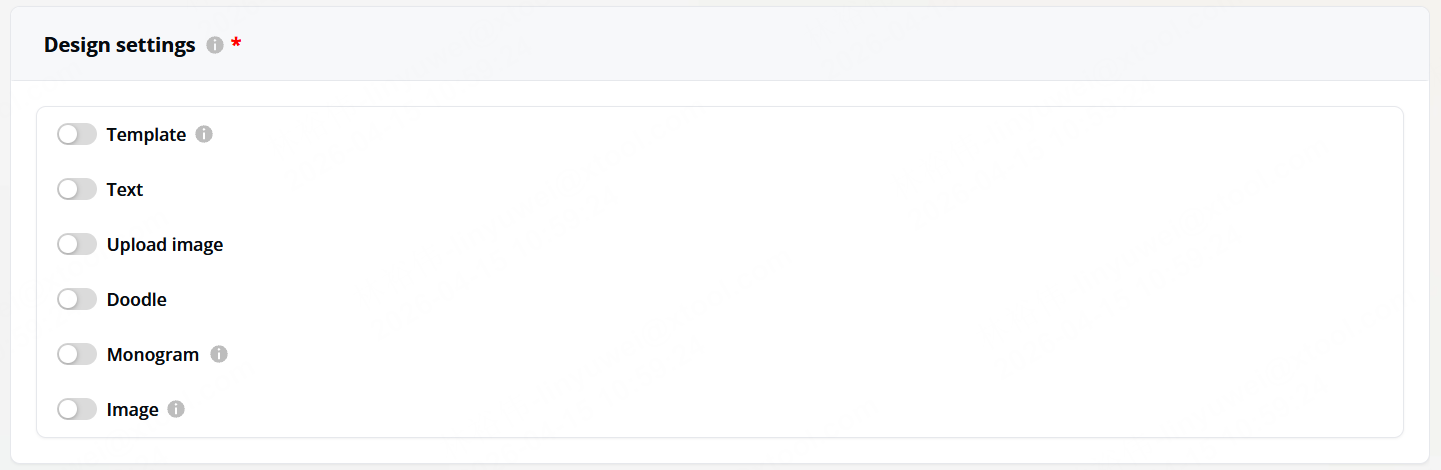
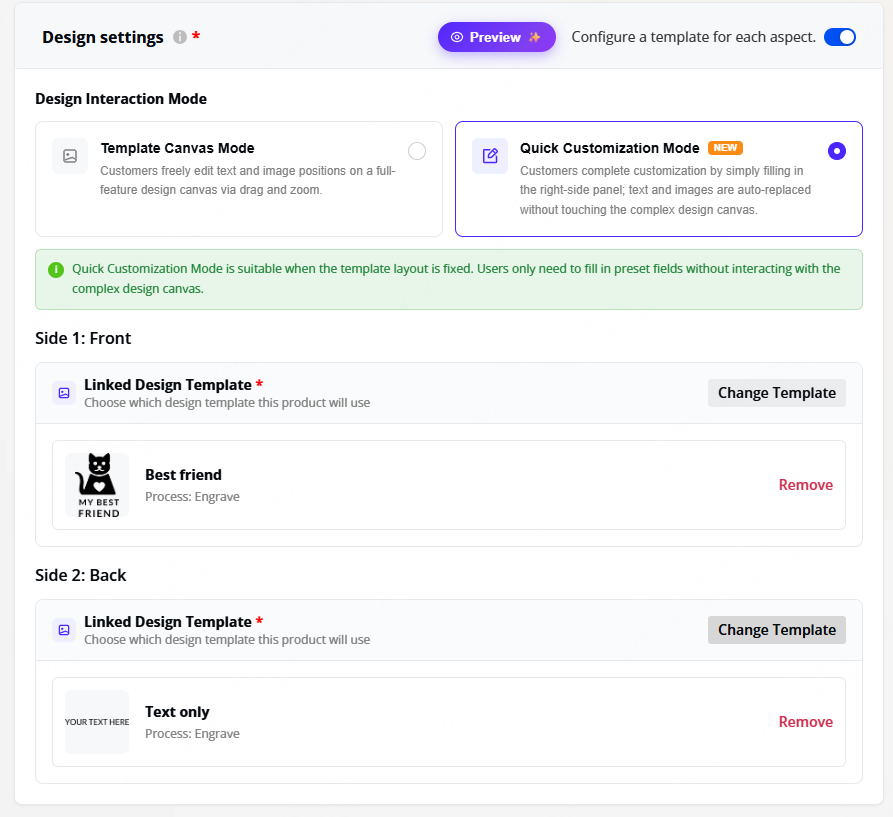
3. Design Settings
Toggle on the creative tools you want customers to access: Template, Text, Upload Image, Monogram, Doodle, and AI Style Filters. (Covered in depth in Set Up Designs & Templates)
Design Settings now also offers a Quick Customization Mode alongside the original Canvas Mode.
In Quick Customization Mode, you choose a Template from your Design Center; the template's layout becomes the design, and customers fill it in like a form by swapping the text and images you've marked as editable. Use it when you want a faster, more on-brand checkout for e-commerce flows. (Covered in depth in this Quick Start Guide to Create a Blank Customized Product.)
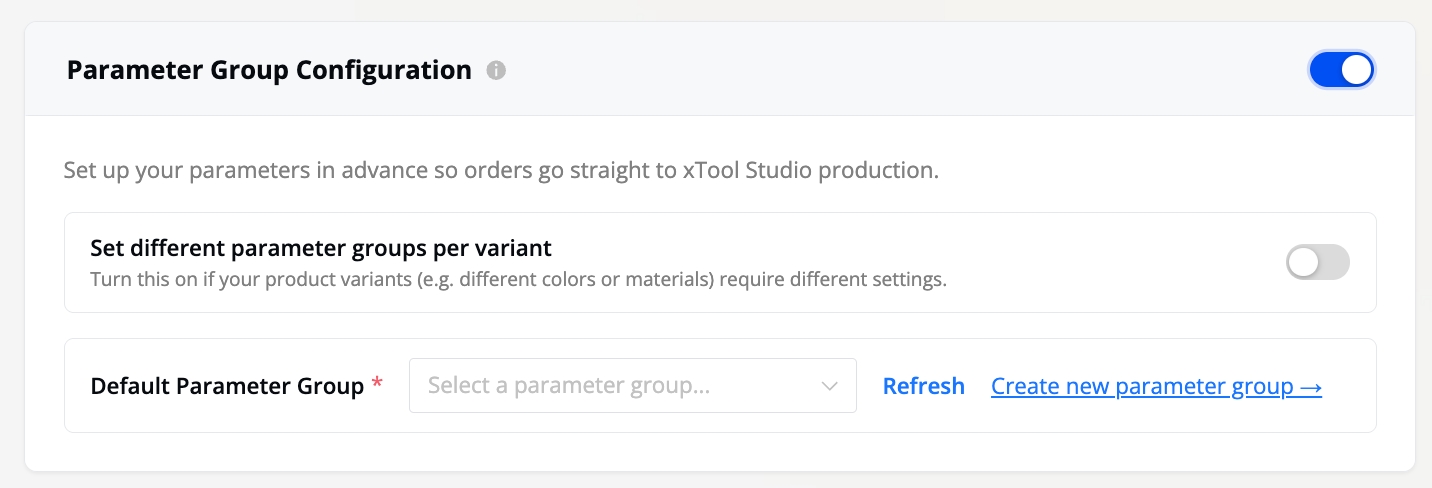
4. Parameter Group Configuration
Parameter Group is Pre-configuring parameters that enable each order to arrive in xTool Studio ready ess in one click. You can set one set of parameters for the whole product or assign different ones per variant (useful when SKUs are made from different materials).
If you skip this step, you can still import the design file into xTool Studio and manually set the parameters there.
Method B: Using the Template Library
- Product listing information
- Customization zone configuration
- Design assets and template assignments
- Processing parameters
Tips
- Start with a template if you're new. It's the fastest way to see how everything connects — from your store to the customization editor to order processing.
- AI Quick Upload works surprisingly well for standard products. Try it even with casual phone photos.
- You can always edit products later. Nothing is locked once published — update images, descriptions, or customization settings at any time.
- Try Quick Customization Mode for ecommerce listings. A fixed template with a few editable fields tends to convert better than a blank canvas, especially for first-time customers.